Standalone Activities - Python SDK
Standalone Activities are Activities that run independently, without being orchestrated by a Workflow. Instead of starting an Activity from within a Workflow Definition, you start a Standalone Activity directly from a Temporal Client.
The way you write the Activity and register it with a Worker is identical to Workflow Activities. The only difference is that you execute a Standalone Activity directly from your Temporal Client.
This page covers the following:
- Get Started with Standalone Activities
- Run a Worker with the Activity registered
- Execute a Standalone Activity
- Start a Standalone Activity without waiting for the result
- Get a handle to an existing Standalone Activity
- Wait for the result of a Standalone Activity
- List Standalone Activities
- Count Standalone Activities
- Run Standalone Activities with Temporal Cloud
This documentation uses source code from the hello_standalone_activity sample.
Get Started with Standalone Activities
Prerequisites:
-
Python 3.9+
-
uv - Python package manager. Install with:
brew install uvOr see the uv installation guide for other platforms.
-
Temporal Python SDK (v1.23.0 or higher)
uv add temporalio -
Temporal CLI v1.7.0 or higher
Install with Homebrew:
brew install temporalOr see the Temporal CLI install guide for other platforms.
Verify the installation:
temporal --version
Start the Temporal development server:
temporal server start-dev
This command automatically starts the Temporal development server with the Web UI, and creates the default Namespace.
It uses an in-memory database, so do not use it for real use cases.
All code samples on this page use
ClientConfig.load_client_connect_config()
to configure the Temporal Client connection. It responds to environment
variables and TOML configuration
files, so the same code works against a local dev
server and Temporal Cloud without changes. See Run Standalone Activities with Temporal
Cloud below.
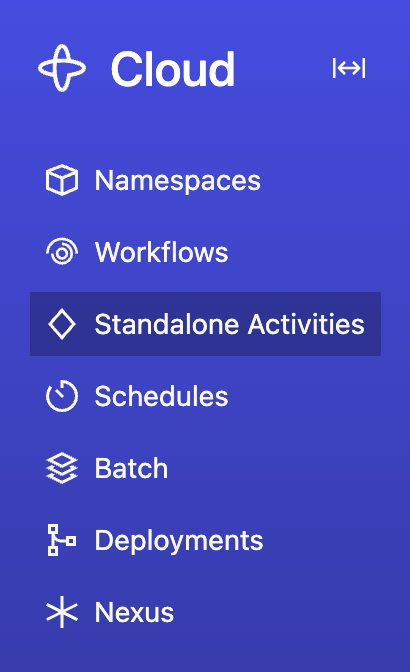
The Temporal Server will now be available for client connections on localhost:7233, and the
Temporal Web UI will now be accessible at http://localhost:8233. Standalone
Activities are available from the nav bar item located towards the top left of the page:
Clone the samples-python repository to follow along:
git clone https://github.com/temporalio/samples-python.git
cd samples-python
The sample project is structured as follows:
hello_standalone_activity/
├── my_activity.py
├── worker.py
├── execute_activity.py
├── start_activity.py
├── list_activities.py
└── count_activities.py
Write an Activity Function
An Activity in the Temporal Python SDK is just a normal function with the @activity.defn
decorator. It can optionally be an async def. The way you write a Standalone Activity is identical
to how you write an Activity to be orchestrated by a Workflow. In fact, an Activity can be executed
both as a Standalone Activity and as a Workflow Activity.
hello_standalone_activity/my_activity.py
# my_activity.py
from dataclasses import dataclass

from temporalio import activity


@dataclass
class ComposeGreetingInput:
    greeting: str
    name: str


@activity.defn
def compose_greeting(input: ComposeGreetingInput) -> str:
    activity.logger.info("Running activity with parameter %s" % input)
    return f"{input.greeting}, {input.name}!"
Run a Worker with the Activity registered
Running a Worker for Standalone Activities is the same as running a Worker for Workflow Activities — you create a Worker, register the Activity, and run the Worker. The Worker doesn't need to know whether the Activity will be invoked from a Workflow or as a Standalone Activity. See How to run a Worker for more details on Worker setup and configuration options.
hello_standalone_activity/worker.py
import asyncio
from concurrent.futures import ThreadPoolExecutor

from temporalio.client import Client
from temporalio.envconfig import ClientConfig
from temporalio.worker import Worker

from hello_standalone_activity.my_activity import compose_greeting


async def main():
    connect_config = ClientConfig.load_client_connect_config()
    connect_config.setdefault("target_host", "localhost:7233")
    client = await Client.connect(**connect_config)
    worker = Worker(
        client,
        task_queue="my-standalone-activity-task-queue",
        activities=[compose_greeting],
        activity_executor=ThreadPoolExecutor(5),
    )
    print("worker running...", end="", flush=True)
    await worker.run()


if __name__ == "__main__":
    asyncio.run(main())
Open a new terminal, navigate to the samples-python directory, and run the Worker:
uv run hello_standalone_activity/worker.py
Leave this terminal running - the Worker needs to stay up to process activities.
Execute a Standalone Activity
Use
client.execute_activity()
to execute a Standalone Activity. Call this from your application code, not from inside a Workflow
Definition. This durably enqueues your Standalone Activity in the Temporal Server, waits for it to
be executed on your Worker, and then fetches the result.
hello_standalone_activity/execute_activity.py
import asyncio
from datetime import timedelta

from temporalio.client import Client
from temporalio.envconfig import ClientConfig

from hello_standalone_activity.my_activity import ComposeGreetingInput, compose_greeting


async def my_application():
    connect_config = ClientConfig.load_client_connect_config()
    connect_config.setdefault("target_host", "localhost:7233")
    client = await Client.connect(**connect_config)

    activity_result = await client.execute_activity(
        compose_greeting,
        args=[ComposeGreetingInput("Hello", "World")],
        id="my-standalone-activity-id",
        task_queue="my-standalone-activity-task-queue",
        start_to_close_timeout=timedelta(seconds=10),
    )
    print(f"Activity result: {activity_result}")


if __name__ == "__main__":
    asyncio.run(my_application())
To run it:
- Make sure the Temporal Server is running (from the Get Started step above).
- Make sure the Worker is running (from the Run a Worker step above).
- Open a new terminal, navigate to the
samples-pythondirectory, and run:
uv run hello_standalone_activity/execute_activity.py
Or use the Temporal CLI:
temporal activity execute \
  --type compose_greeting \
  --activity-id my-standalone-activity-id \
  --task-queue my-standalone-activity-task-queue \
  --start-to-close-timeout 10s \
  --input '{"greeting": "Hello", "name": "World"}'
Start a Standalone Activity without waiting for the result
Starting a Standalone Activity means sending a request to the Temporal Server to durably enqueue your Activity job, without waiting for it to be executed by your Worker.
Use
client.start_activity()
to start your Standalone Activity and get a handle:
activity_handle = await client.start_activity(
    compose_greeting,
    args=[ComposeGreetingInput("Hello", "World")],
    id="my-standalone-activity-id",
    task_queue="my-standalone-activity-task-queue",
    start_to_close_timeout=timedelta(seconds=10),
)
With the Temporal Server and Worker running, open a new terminal in the samples-python directory and run:
uv run hello_standalone_activity/start_activity.py
Or use the Temporal CLI:
temporal activity start \
  --type compose_greeting \
  --activity-id my-standalone-activity-id \
  --task-queue my-standalone-activity-task-queue \
  --start-to-close-timeout 10s \
  --input '{"greeting": "Hello", "name": "World"}'
Get a handle to an existing Standalone Activity
You can also use client.get_activity_handle() to create a handle to a previously started Standalone Activity:
activity_handle = client.get_activity_handle(
    activity_id="my-standalone-activity-id",
    run_id="the-run-id",
)
You can now use the handle to wait for the result, describe, cancel, or terminate the Activity.
Wait for the result of a Standalone Activity
Under the hood, calling client.execute_activity() is the same as calling
client.start_activity()
to durably enqueue the Standalone Activity, and then calling await activity_handle.result() to
wait for the activity to be executed and fetch the result:
activity_result = await activity_handle.result()
Or use the Temporal CLI to wait for a result by Activity ID:
temporal activity result --activity-id my-standalone-activity-id
List Standalone Activities
Use
client.list_activities()
to list Standalone Activity Executions that match a List Filter query. The result is
an async iterator that yields ActivityExecution entries.
These APIs return only Standalone Activity Executions. Activities running inside Workflows are not included.
hello_standalone_activity/list_activities.py
import asyncio

from temporalio.client import Client
from temporalio.envconfig import ClientConfig


async def my_application():
    connect_config = ClientConfig.load_client_connect_config()
    connect_config.setdefault("target_host", "localhost:7233")
    client = await Client.connect(**connect_config)

    activities = client.list_activities(
        query="TaskQueue = 'my-standalone-activity-task-queue'",
    )

    async for info in activities:
        print(
            f"ActivityID: {info.activity_id}, Type: {info.activity_type}, Status: {info.status}"
        )


if __name__ == "__main__":
    asyncio.run(my_application())
Run it:
uv run hello_standalone_activity/list_activities.py
Or use the Temporal CLI:
temporal activity list
The query parameter accepts the same List Filter syntax used for Workflow Visibility. For example, "ActivityType = 'MyActivity' AND Status = 'Running'".
Count Standalone Activities
Use client.count_activities() to count
Standalone Activity Executions that match a List Filter query. This returns the total
count of executions (running, completed, failed, etc.) - not the number of queued tasks. It works the
same way as counting Workflow Executions.
hello_standalone_activity/count_activities.py
import asyncio

from temporalio.client import Client
from temporalio.envconfig import ClientConfig


async def my_application():
    connect_config = ClientConfig.load_client_connect_config()
    connect_config.setdefault("target_host", "localhost:7233")
    client = await Client.connect(**connect_config)

    resp = await client.count_activities(
        query="TaskQueue = 'my-standalone-activity-task-queue'",
    )

    print("Total activities:", resp.count)

    for group in resp.groups:
        print(f"Group {group.group_values}: {group.count}")


if __name__ == "__main__":
    asyncio.run(my_application())
Run it:
uv run hello_standalone_activity/count_activities.py
Or use the Temporal CLI:
temporal activity count
Run Standalone Activities with Temporal Cloud
The code samples on this page use ClientConfig.load_client_connect_config(), so the same code
works against Temporal Cloud - just configure the connection via environment variables or a TOML
profile. No code changes are needed.
For a step-by-step guide on connecting to Temporal Cloud, including Namespace creation, certificate generation, and authentication setup in the Cloud UI, see Connect to Temporal Cloud.
Connect with mTLS
Set these environment variables with values from your Temporal Cloud Namespace settings:
export TEMPORAL_ADDRESS=<your-namespace>.<your-account-id>.tmprl.cloud:7233
export TEMPORAL_NAMESPACE=<your-namespace>.<your-account-id>
export TEMPORAL_TLS_CLIENT_CERT_PATH='path/to/your/client.pem'
export TEMPORAL_TLS_CLIENT_KEY_PATH='path/to/your/client.key'
Connect with an API key
Set these environment variables with values from your Temporal Cloud API key settings:
export TEMPORAL_ADDRESS=<your-namespace>.<your-account-id>.tmprl.cloud:7233
export TEMPORAL_NAMESPACE=<your-namespace>.<your-account-id>
export TEMPORAL_API_KEY=<your-api-key>
Then run the Worker and starter code as shown in the earlier sections.